

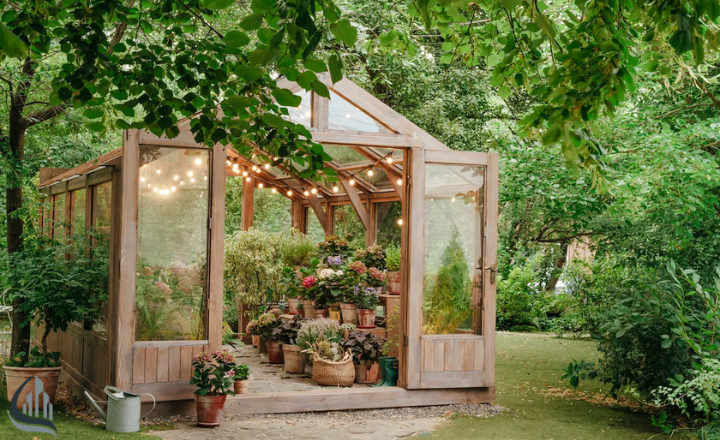
If you love plants but struggle with unpredictable weather, DIY mini greenhouses can make a huge difference. These small greenhouses trap warmth, protect seedlings from frost, and create the perfect environment for faster, stronger growth. The best part? You don’t need expensive materials or advanced skills. With a little creativity and some basic tools, you can set up a mini greenhouse on your balcony, patio, or in your backyard.
Mini greenhouses are perfect for anyone with limited space. They let you grow more plants in a compact area, keep seedlings safe, and give you control over temperature and humidity. Whether you’re starting seeds, growing herbs, or trying out vegetables that are usually tricky in cooler climates, a DIY mini greenhouse gives your plants a head start.
Maximize your growing space with these DIY mini greenhouses
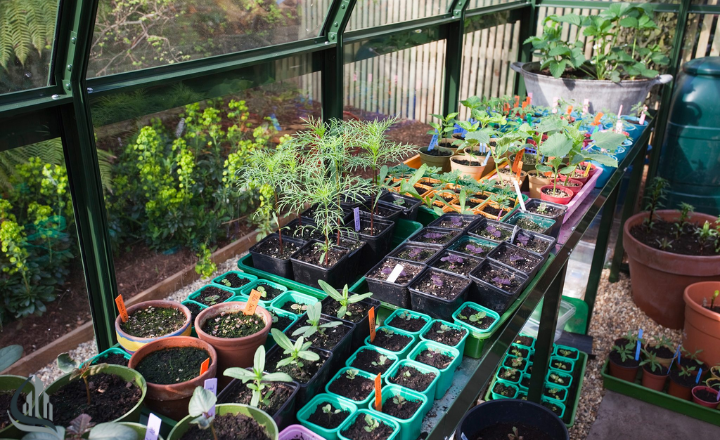
Small greenhouses are perfect for gardeners with limited outdoor areas. A compact mini greenhouse allows you to grow multiple plants in layers or tiers. Vertical designs are ideal for stacking pots, trays, and planters while creating micro-zones that protect different plants based on their specific needs.
By using a small greenhouse, you can start more seedlings, nurture delicate herbs, or extend the growing season for crops that would struggle in cooler conditions. Even a modest balcony or patio can become a productive gardening area. With the right setup, your mini greenhouse can yield fresh herbs, vegetables, and flowers year-round, all while saving space and resources.
1. Upcycle Picture Frames for a Mini Grow Box
Old picture frames can be transformed into a charming mini greenhouse. Gather four frames of the same size, remove the glass and backing, and attach them to a rectangular box using screws or brackets. For the base, use a piece of plywood or thick cardboard, then cover the top with clear plastic or glass.
Place your mini grow box on a windowsill or countertop. It traps warmth and moisture while letting in sunlight, perfect for seedlings or small herbs. You can even hinge the top so it lifts easily for ventilation. It’s a simple, low-cost way to create a small greenhouse that works beautifully for indoor or balcony gardening.
2. Protect Seedlings with Plastic Cups
Plastic cups make excellent mini cloches for seedlings. Choose clear cups and cut small drainage holes in the bottom. Pop them over your plants to trap warmth and moisture. This helps protect young leaves from frost and pests, and encourages stronger growth.
On sunny days, lift the cups slightly to prevent overheating. If your plants are in a breezy area, use small stones to keep the cups in place. It’s an inexpensive, easy solution for creating your first DIY mini greenhouse.
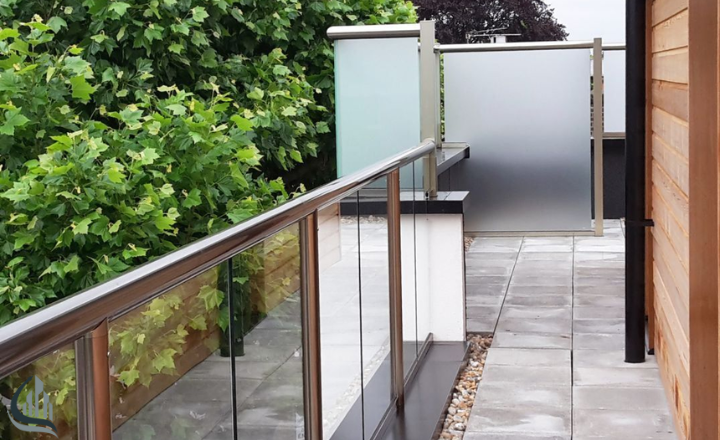
3. Use Balcony Screening to Raise Temperature
If your balcony or terrace is exposed to chilly winds, a simple screen can help. Secure clear plastic sheeting or mesh to railings to cut out gusts while letting sunlight through. You’ll create a warmer microclimate that encourages seedlings to grow steadily.
Leave small gaps or adjustable openings to keep the air circulating and prevent mold. A thermometer can help you keep track of the temperature inside your mini greenhouse. With just a little effort, you can make even a small balcony feel like a productive garden.
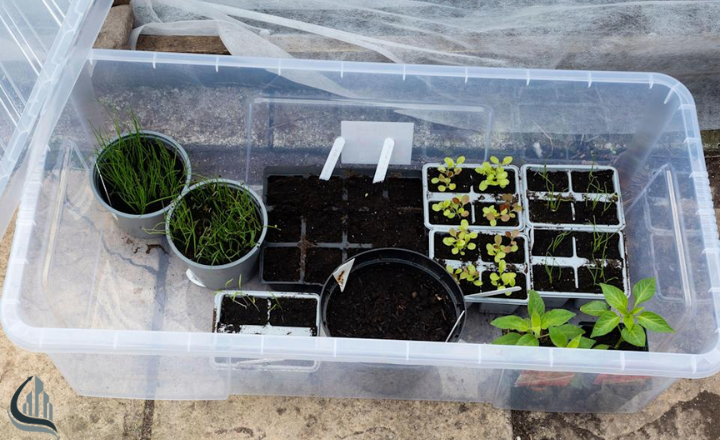
4. Grow Plants in Clear Storage Containers
To create a mini greenhouse using a clear storage container, begin by selecting a container that has a lid for optimal light retention. Clear storage containers are perfect for creating temporary mini greenhouses. Drill a few drainage holes at the bottom and layer with pebbles, then add high-quality soil. Plant your seedlings and close the lid to maintain humidity.
Check the moisture regularly. Position your mini greenhouse in a location that receives indirect sunlight for several hours each day, optimizing growth conditions without overheating your plants. If condensation builds up, slightly crack the lid to let air in. This is a simple, small DIY mini greenhouse solution that works well for herbs, lettuce, and other young plants.
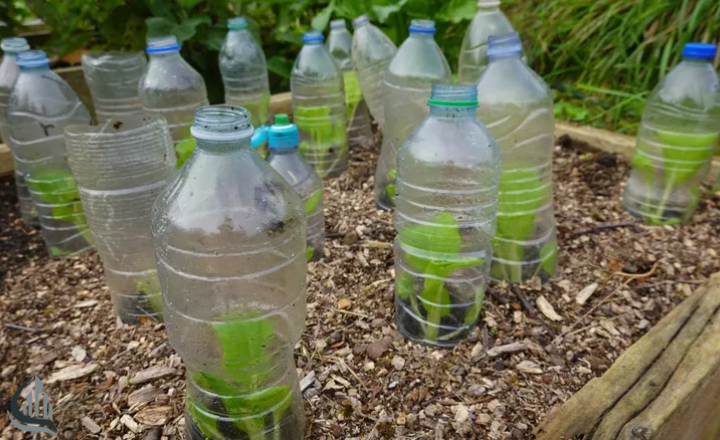
5. Keep Warmth In with Recycled Materials
Using waste materials like cardboard, old plastic bottles, and scrap foam can significantly enhance heat retention in mini greenhouses. Cardboard, old plastic bottles, or foam scraps can help retain heat inside a mini greenhouse. Place cardboard along the base to insulate from cold soil. Fill water bottles with water and position them around the plants because during the day, they absorb heat, releasing it at night.
Line walls with foam and cover everything with clear plastic to trap warmth. To optimize heat retention, cover the greenhouse with a lightweight, clear plastic tarp that allows sunlight in while minimizing heat escape.This is an easy, budget-friendly way to protect plants while recycling materials you already have around the house.
6. Build a Small Greenhouse with Polycarbonate Sheets
Polycarbonate sheets are lightweight, shatterproof, and insulating. You can build a small DIY greenhouse using these sheets and a simple timber or metal frame. Once the frame is complete, carefully attach the polycarbonate sheets. Begin at one end and work your way to the other, securing the sheets with screws through pre-drilled holes.
Ensure that you seal all edges with weatherproof tape or silicone to prevent leaks. Finally, anchor the greenhouse to the ground with stakes or concrete blocks for added stability.This method creates a more permanent small greenhouse that can last several seasons. It’s perfect for growing vegetables, herbs, and flowers in a controlled environment.
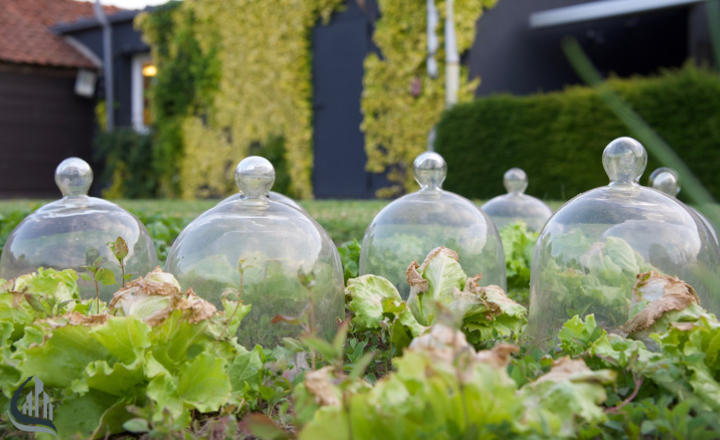
7. Use Glass or Jars for Emergency Covers
Using upturned glasses as temporary cloches is an effective and affordable method for protecting individual seedlings. Simply place a clean, clear glass, like a small drinking or mason jar, over each seedling at the start of the growing season. Ensure the glass is wide enough to avoid touching the leaves, allowing for some space around the plant.
This setup creates a mini greenhouse effect, trapping moisture. Make sure the glass doesn’t touch the leaves. To promote ventilation, slightly tilt each glass or leave a small gap at the base. This helps prevent overheating, especially on sunny days. Keep an eye on the seedlings during heat spells, removing the glasses if temperatures rise too high. With minimal materials and easy setup, you can create a low-budget DIY mini greenhouse.
8. Cover Shelving Units to Make a Vertical Mini Greenhouse
A small shelving unit can be transformed into a multi-layered mini greenhouse. Start by selecting clear plastic sheeting or glass panels that fit the dimensions of your shelving unit. Securely attach these materials to the sides of the shelf, ensuring that you leave one side open for ventilation. Proper airflow is crucial for moisture control and prevents mold buildup.
Make sure the shelves are spaced appropriately to allow light to penetrate each level. Regularly check moisture levels, as a mini greenhouse can retain humidity. This setup creates a functional space for your small DIY mini greenhouse, making it easy to nurture seedlings or house small plants. This vertical approach is ideal for urban gardeners with limited floor space.
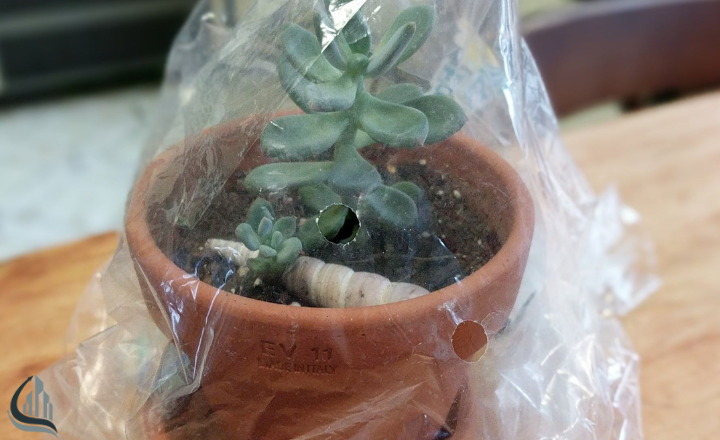
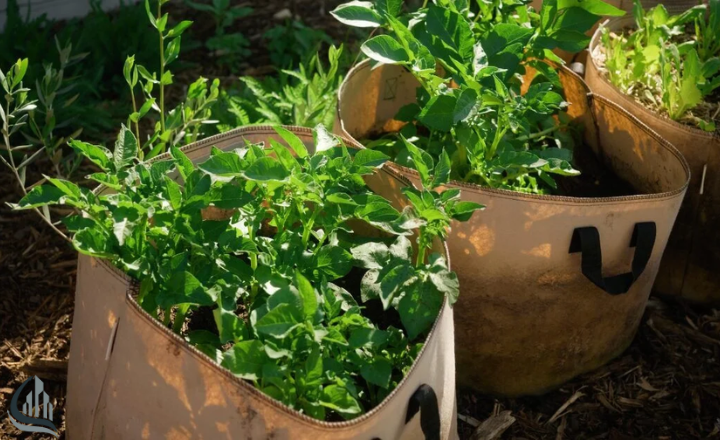
9. Use Grow Bags for Larger Plants
To cover seedlings or small plants with a clear grow bag, start by selecting a suitable site in your greenhouse. Place the grow bag gently over the seedlings, ensuring the bag is large enough to avoid direct contact with the plants’ leaves. Put the bag to the ground or pot using soil or small stones at the base. This prevents the bag from blowing away while allowing for stability.
After securing the bag, monitor the moisture level inside. By following these straightforward steps, you can provide practical protection for your plants, promoting healthier growth in your greenhouse DIY setup.
11. Shelter Plants with Clear Umbrellas
A clear umbrella can cover a group of small pots, keeping them dry and warm. Position the umbrella over the plants to create a makeshift greenhouse. Ensure it’s anchored firmly by placing heavy objects, like stones or bricks, around the base to prevent it from blowing away.
Adjust the umbrella’s position as necessary throughout the day to maximize shade and protection. It’s an inventive way to provide a mini greenhouse effect for multiple plants at once, especially for casual or urban gardening setups.
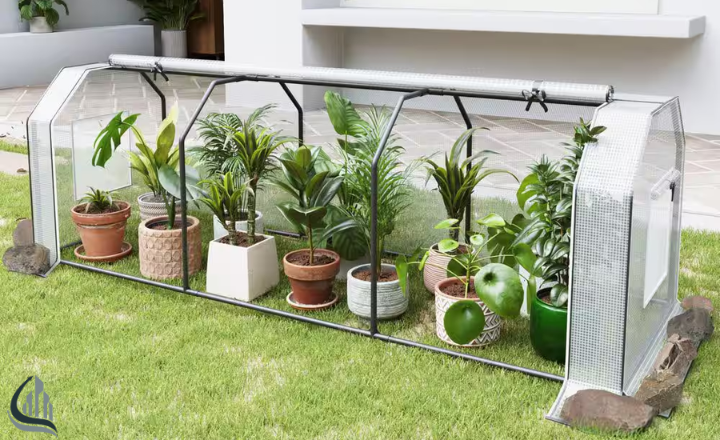
12.Create Small Plant Tunnels for Raised Beds
These simple structures create a mini greenhouse effect, trapping warmth and moisture while shielding plants from wind and heavy rain. Built using lightweight materials like PVC pipes and plastic sheeting, they can be customized to fit any bed size, making them accessible for any gardener.
Using small plant tunnels also helps manage pests naturally. The enclosed space deters insects, reducing the need for chemical treatments. These tunnels promote better air circulation, reducing the risk of fungal diseases.
13. Turn Wooden Crates into Mini Greenhouses
Transforming wooden crates into mini greenhouses is a simple yet innovative way to boost your gardening game. Start by placing a crate on its side and lining the bottom with a waterproof material, like plastic sheeting. Add potting soil and your favorite plants. Next, secure a clear plastic sheet over the top to create a greenhouse effect.
Not only do these mini greenhouses save space, but they also make gardening accessible year-round. You can position them on patios, balconies, or even indoors. This solution is perfect for those with limited garden space but a passion for growing. With a bit of creativity, you can personalize each crate, adding labels or colors to fit your style.
14. Build a Vertical Mini Greenhouse with Stacked Trays
Building a vertical mini greenhouse with stacked trays is an excellent way to maximize your gardening space. Start by choosing sturdy, lightweight trays that can easily fit into your available area. Use a sturdy shelving unit to stack your trays, ensuring good air circulation and access to sunlight.
You can plant herbs, leafy greens, or even small tomatoes in each tray. This method not only conserves space but also makes watering and harvesting easier. Think about using a drip irrigation system to make your setup even more efficient. With a little creativity, your vertical greenhouse can become a lush haven for fresh produce.
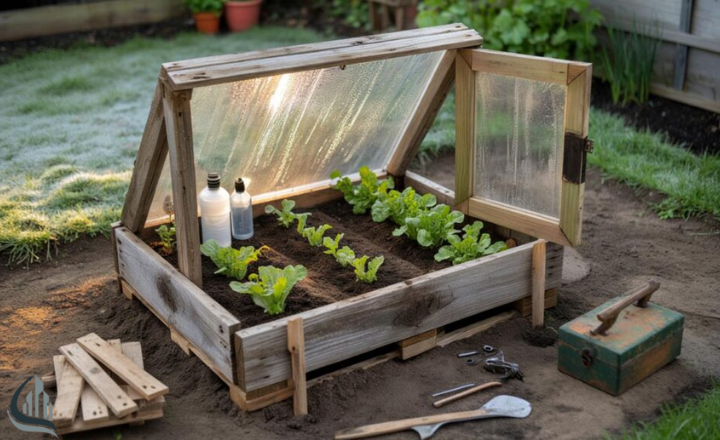
15. Start Seeds in a Small Cold Frame
Cold frames are simple DIY mini greenhouses made from old windows or wooden frames. Place in a sunny area and leave a small gap for ventilation. Elevate slightly to allow water drainage. Cold frames are perfect for starting seedlings early and protecting young plants from frost. They’re an easy, low-budget way to extend your growing season.
16. Experiment with Exotic Plants in Your Mini Greenhouse
A DIY mini greenhouse isn’t just for herbs and common vegetables. You can try growing exotic or heat-loving plants that usually struggle in cooler climates. Chillies, sweet peppers, or flowering plants like zinnias and morning glories thrive under controlled conditions. The extra warmth and protection give them a strong start, and watching these unusual varieties grow can be incredibly rewarding.
17. Use Reflective Materials to Boost Light
If your mini greenhouse is in a shaded corner or balcony, reflective surfaces can make a huge difference. Place aluminum foil, white boards, or even light-colored tiles around your plants to bounce sunlight onto them. This increases photosynthesis and encourages faster growth. It’s a simple, low-budget way to make the most of every ray of sun, especially for small greenhouses that don’t get full sunlight all day.
18. Maintain Your Mini Greenhouse for Long-Term Success
A small greenhouse is only effective if it’s properly maintained. Regularly check for condensation, pests, and soil moisture. Clean the glass or plastic panels to keep sunlight coming through, and rotate your plants to ensure even growth. Monitoring temperature and ventilation daily ensures your seedlings stay healthy and don’t overheat. Taking a few minutes each day to care for your mini greenhouse goes a long way toward long-term gardening success.
Read about how to design a garden.
Conclusion
Building DIY mini greenhouses are effective way to protect seedlings, extend the growing season, and make the most of limited space. Whether you upcycle picture frames, use clear storage containers, or create simple plant tunnels, these methods provide controlled conditions for your plants.
By focusing on proper ventilation, light, and temperature management, you can maintain healthy growth without expensive equipment. Using practical materials and setups from this guide, you can create functional mini greenhouses that suit balconies, patios, or backyard spaces efficiently.
FAQs
Can you make your own mini greenhouse?
Yes, you can easily make your own mini greenhouse using materials like wood, plastic sheeting, or old windows. It’s a fun DIY project!
Do mini greenhouses need air holes?
Yes, mini greenhouses should have air holes or vents. This helps with air circulation, preventing overheating and keeping your plants healthy.
What is the cheapest way to make a greenhouse?
The cheapest way to make a greenhouse is to repurpose materials you already have, like old pallets, plastic sheets, or even large clear storage bins.
What is a mini greenhouse called?
A mini greenhouse is often referred to as a “cold frame” or “mini garden shed.” These terms describe small structures designed for gardening.
Do mini greenhouses stay warm in winter?
Yes, mini greenhouses can stay warm in winter. They trap heat from the sun, but you may need to add extra insulation on very cold days.
Should you open your greenhouse every day?
It’s a good idea to open your greenhouse daily to let in fresh air and reduce humidity. This helps prevent mold and keeps plants healthy.
Can plants grow in a mini greenhouse year-round?
Yes, many plants can grow in a mini greenhouse year-round, especially if you provide some heating during colder months.
What plants are best for a mini greenhouse?
Great plants for a mini greenhouse include herbs, lettuce, and small vegetables. They thrive in a controlled environment with proper care.